Basic use
Arachne has only a few controls. To begin resizing, open a file (you can also specify a filename on the command line). At the moment, TIFF and JPEG files are supported. The dimensions of the image must be no greater than 4096x4096 pixels. Arachne starts in Original mode, which displays the original image unaltered in the main window.

The other two modes are Width and Height which allow you to make an image narrower or shorter respectively. One of Arachne's limitations is that you cannot change width and height at the same time.
To adjust the width of the image, click on the Width button (or select it from the Mode menu). Arachne tries to automatically work out which parts of the image are the most interesting and then does some work to let you resize the image. This should only take a few seconds.

It's worth the wait though, because now to resize the image all you have to do is resize the main window, and the contents will fluidly adjust.

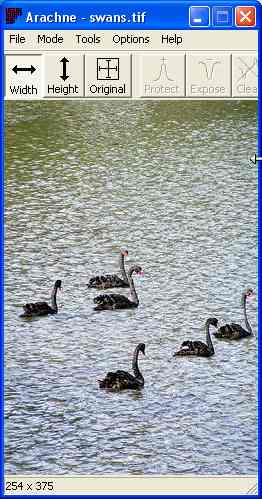
Notice that the swans are relatively unaffected by the resize: the water has been shrunk rather than the swans! By stretching the window beyond the width of the original image you can make it wider. This time the boring bits are duplicated, so that again the interesting parts of the image stay much the same size and shape.

To make the image shorter or taller instead, just select the Height mode. Note that when you switch modes you are still resizing the original image. If you want to do resizes in both directions you'll have to save the result of one resize, load that file and resize in the other direction. There will likely be a feature to do this automatically in future.
You can save the result of resizing at any time from the File menu.